
Chef’s Kitchen in our previous home,
In Learning to Love My Stretch Marks, I wrote about our family’s transition from a big new house to a not as big older house. While our new old house is ideal for our family, the one thing we knew we would miss was our big beautiful chef’s kitchen.
I find the whimsical ‘70s tile in our bathrooms endearing but the Formica counter tops and back splash and “vintage” cook top were less than ideal for us. Kevin and I had agreed to live with it for a year or two before doing a major kitchen renovation.

That 70’s Kitchen
Not knowing how long we could stand it, we decided to install an inexpensive vinyl floor over the existing worn out floor and I decided it would be fun to paint the dark walnut cabinets a beautiful gray. We found the cheapest flooring we could live with and I consulted with a friend for some DIY chalk paint advice and got busy with our temporary “band aid” to make the kitchen a little more us.
A Fun Little Project

Preparing Cabinets for Paint
The cabinet painting process was taking a little longer than I had hoped. Before painting kitchen cabinets you must clean, sand and, in my case, prime the nastiest ones. I had taken a 2 week break from the congressional campaign I was working on to work on the kitchen and get moved into our home. I only made it half way through the project before having to stop and put it off until after the November 4th election.
Living with a half painted kitchen was driving me crazy! I could not wait to get back to my project, but at least the floor was new.

Half-painted Cabinets!
Our Crisis
On November 2nd, I was cleaning up in the kitchen when I noticed the new baseboard near the refrigerator looked strange. It looked like it was loose and my first thought was, “Those floor guys must have forgotten to nail that piece down!” Upon closer inspection, we discovered that it wasn’t loose. It was swollen and squishy.
We had discovered a leak. A slow leak that had been leaking for the two months we had been in the house. A piece of trim had been installed right up against the copper water line to the refrigerator breaking the seal and causing a very slow trickle. Of course Kevin was out the door on a business trip that very same day leaving me to handle the situation which “shouldn’t be that bad.” After all, there was no standing water.

This is what we found behind the baseboard. Gross!
It only gets better…
No. There was no standing water, but we discovered that the water had traveled undetected under the flooring and into adjacent rooms. It had wicked up the wall and into the cabinet frames. It had leaked into the crawl space soaking a huge area under the house. It was a slimy, smelly mess.
We had a disaster on our hands! All I could do was laugh as I watched the remediation guys ripping out cabinets and sheetrock. I laughed when the asbestos test came back positive and the guys had to come in wearing hazmat suits to remove the flooring and a layer of subfloor. I laughed when they cut a hole in the family room floor to pump warm air under the house to dry out the crawl space.

Blowing warm air into the crawl space through a hole in our family room floor. Notice the plastic curtain that was installed to protect our furniture. Lovely,
For about a week we had air scrubbers, high powered industrial fans and dehumidifiers running non-stop until everything was dry and all “growth” was removed and remediation was complete. My only thought was, “Thank God I had not finished my cabinet project!”
The Logical Decision
A week later, Kevin returned from his business trip and saw the situation for himself. By the time he got home the slime and stink was gone and it was looking pretty good!
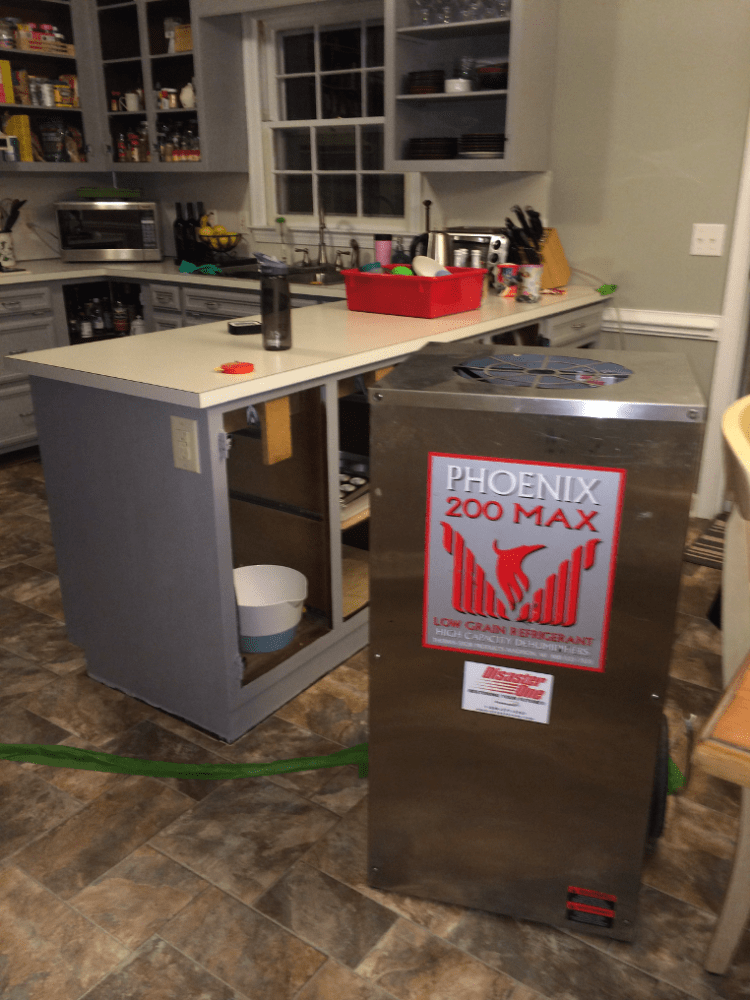
Huge air scrubber and dehumidifiers were brought in. At one point we had 5 running at one time. They were quite loud!
After assessing the situation, we decided it made sense to move forward with a full kitchen remodel. The problem was, we were now in the middle of holiday season and would have to live with half a kitchen until, well, now! Our remodel has begun and I look forward to sharing our progress with you until the big reveal.

Here we go! Our project has begun.
I am a planner and this project was absolutely not part of the plan. Nowhere on my calendar had I penciled in “Completely gut and remodel kitchen.”
Normally, something like this unexpected kitchen remodel would have sent me into a full on freak-out with temper tantrums and anxiety attacks followed by medication and many bottles of wine. But because I had been learning to stretch all year,when this crisis hit I was able to handle it calmly and with a sense of humor.
This is not a big deal.
It is inconvenient (look at the photos!) and it is expensive but it could have been worse. The mold growth was not extensive and no one got sick. The floor didn’t cave in (I’m told that happens a lot with slow leaks). And our home owner’s insurance covered way more than we expected.
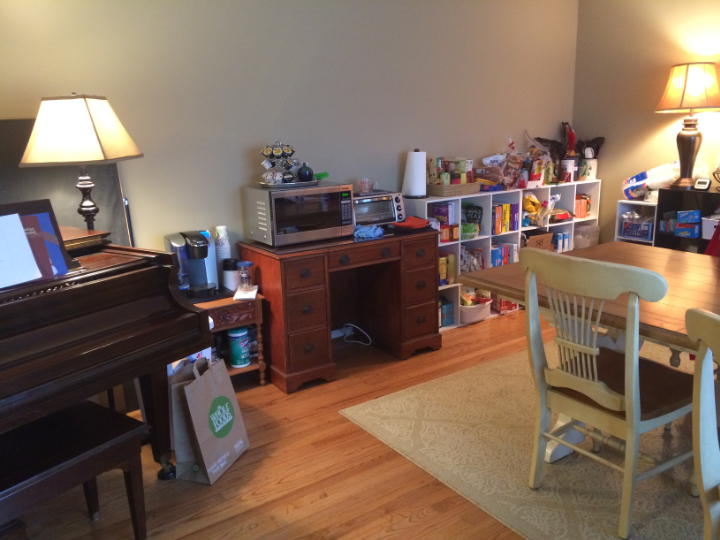
Our current “kitchen” is in our living room.
I do feel a little sad about my cabinet project, though. I now plan to use my left over paint to paint my table and some other furniture pieces I have around the house. I also plan to bring some of my original DIY project inspiration into the brand new kitchen.
***PSA – Ice Maker line leaks are extremely common. Maybe you already know this, but I didn’t. You can purchase an inexpensive moisture detector that will sound an alarm at the first sign of a leak. They are great for washing machines, dishwashers, refrigerators…really anywhere you have a water line. Many insurance companies do not cover the kind of water damage we experienced. We feel extremely blessed and pray Nationwide doesn’t drop us after this claim!
*Previously posted in February 2015 on the Hogbloggers site.
© Elizabeth Smith 2015
